Understanding the Basics of Photo Editing
Before diving into specific tools and apps, it’s essential to understand the basics of photo editing. A good edit enhances a photo by adjusting its color, brightness, contrast, and sharpness, making the image more visually appealing. Filters add another layer of editing by applying predefined color tones and effects to your photos. While iPhone’s native photo editing tools are powerful, there are many Android apps that offer similar or even superior functionalities.
Essential Photo Editing Terms
To make the most out of any photo editing app, it’s important to familiarize yourself with some basic editing terms:
- Brightness: Adjusts the lightness or darkness of your photo. Increasing brightness can make an image look more vivid, while decreasing it can add moodiness.
- Contrast: Enhances the difference between light and dark areas in your photo. High contrast can make an image look more dramatic, while low contrast can make it look softer.
- Saturation: Controls the intensity of the colors in your photo. Higher saturation results in more vibrant colors, while lower saturation makes colors appear muted.
- Exposure: Refers to the amount of light captured in your photo. Adjusting exposure can help correct images that are too dark or too bright.
- Sharpness: Affects the clarity of your photo by making edges more distinct. This can make a photo look more detailed.
- White Balance: Adjusts the color balance of your photo, ensuring that whites look white and other colors appear natural.
Top Android Apps for iPhone-Like Photo Editing
There are numerous apps available on the Google Play Store that offer robust photo editing capabilities comparable to, or even better than, those found on iPhones. Here are some of the best:
- Snapseed
Developed by Google, Snapseed is a professional-grade photo editing app that’s completely free. It offers a wide range of tools and filters, including some powerful features like selective adjust, healing, and brush. Snapseed’s interface is intuitive, making it easy to use even for beginners, while offering enough advanced features for more experienced users. - VSCO
VSCO is well-known for its stunning film-like filters that mimic classic film stocks. It also provides advanced editing tools like exposure, contrast, and saturation adjustments. VSCO is popular among users who want to achieve a more artistic or vintage look in their photos. The app also offers a community feature where you can share your edits and get inspiration from others. - Adobe Lightroom Mobile
Adobe Lightroom is a powerful editing tool that’s available on both desktop and mobile devices. The mobile version offers many of the same features as its desktop counterpart, including RAW photo editing, exposure control, and color adjustments. It’s perfect for users who want a more in-depth editing experience and are willing to invest time in learning the app’s functionalities. - PicsArt
PicsArt combines photo editing with a social platform, allowing you to edit your photos with tools and filters and then share them with a community of like-minded individuals. It offers a variety of creative tools, such as collage making, drawing, and adding text, along with standard editing features like cropping, brightness adjustment, and applying filters. - Prisma
Prisma is an app that turns your photos into works of art using the styles of famous artists like Van Gogh and Picasso. While it doesn’t offer traditional editing tools, its unique filters make it stand out. It’s perfect for users looking to create eye-catching images with a distinct artistic flair.
Step-by-Step Guide to Achieving iPhone-Like Photo Edits on Android
Now that you know which apps can help you achieve stunning results, let’s go through a step-by-step process to create iPhone-like edits using Snapseed as an example.
- Import Your Photo
Start by opening Snapseed and importing the photo you want to edit. You can do this by tapping the “Open” button and selecting the photo from your gallery. - Adjust Basic Settings
Begin with the “Tune Image” tool. Here, you can adjust brightness, contrast, saturation, and more. Start with the brightness and exposure to ensure your photo has a good base. Gradually adjust contrast and saturation to make the colors pop without overdoing it. - Apply Selective Adjustments
Snapseed’s “Selective” tool allows you to apply adjustments to specific areas of your photo. For example, if the sky in your photo is too bright, you can lower the brightness in just that area without affecting the rest of the image. - Use the Healing Tool
The healing tool in Snapseed is perfect for removing unwanted objects or blemishes from your photo. Simply tap on the area you want to remove, and the app will replace it with a surrounding area, seamlessly blending it into the background. - Sharpen Your Image
Navigate to the “Details” tool to adjust the sharpness and structure of your photo. This can help make your image look more detailed and crisp, similar to the clarity found in iPhone photos. - Apply Filters
Finally, use Snapseed’s filters to give your photo the final touch. The app offers a range of filters, from vintage to modern, that can transform the look and feel of your photo. Play around with different filters until you find one that complements your photo. - Export Your Photo
Once you’re satisfied with your edits, export your photo in the highest quality possible. This ensures that your photo maintains its clarity and detail when shared on social media or printed.
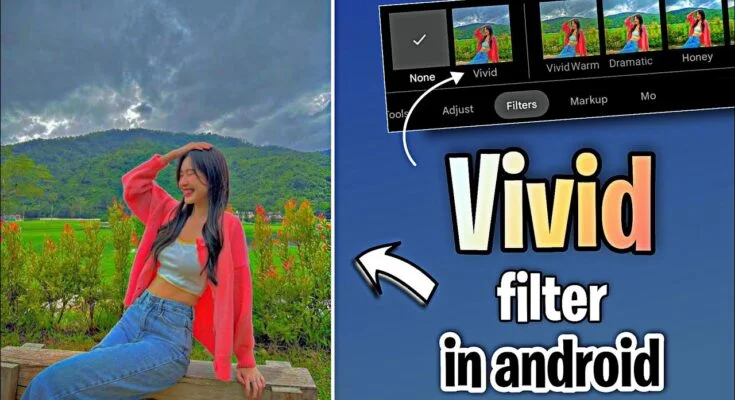
Creating Stunning Results with Vivid HD Filters
Filters can make a significant difference in your photo editing. On Android, apps like Snapseed, VSCO, and Lightroom offer a range of vivid HD filters that can make your photos stand out. Here’s how to make the most of these filters:
- Choose the Right Filter for Your Photo
Not all filters are suitable for every photo. A filter that looks great on a landscape photo might not work as well for a portrait. Experiment with different filters to see which one enhances your photo the most without overpowering it. - Adjust the Intensity of the Filter
Most apps allow you to adjust the intensity of a filter. This is a crucial step in achieving a natural look. Start with a high intensity and gradually lower it until the filter enhances your photo without looking overdone. - Combine Filters for Unique Effects
Don’t be afraid to combine filters. Some apps, like VSCO and Lightroom, allow you to layer multiple filters, creating a unique look. Start with a base filter and add others to enhance certain aspects of your photo, such as color or contrast. - Use Filters to Create a Consistent Aesthetic
If you’re editing photos for social media, using the same or similar filters across your photos can create a consistent aesthetic. This is especially useful for Instagram feeds, where a cohesive look can make your profile more appealing.
Advanced Editing Tips for Android Users
If you’re ready to take your photo editing skills to the next level, here are some advanced tips to achieve even better results:
- Edit in RAW Format
If your Android phone supports it, try shooting and editing in RAW format. RAW files contain more data than JPEGs, giving you greater flexibility in editing, especially when adjusting exposure, color balance, and sharpness. - Use Curves for Precise Adjustments
The Curves tool in apps like Lightroom allows you to adjust the tonal range of your photo more precisely than basic brightness and contrast sliders. By adjusting the curve, you can make fine-tuned adjustments to highlights, midtones, and shadows. - Play with Light and Shadows
Experiment with light and shadows to create depth in your photos. Adjust the shadows to bring out details in darker areas, and manipulate highlights to enhance brighter areas without losing detail. - Dodge and Burn
Dodging and burning are techniques used to lighten (dodge) or darken (burn) specific areas of a photo. This can add depth and dimension to your images, making them look more dynamic. Apps like Snapseed have tools for dodging and burning. - Create Custom Presets
If you find yourself using the same settings or filters frequently, consider creating custom presets. This can save time and help maintain consistency across your photos. Many apps, including Lightroom and VSCO, allow you to save your edits as presets.
Conclusion
Achieving iPhone-like photo edits on your Android device is not only possible but can be an enjoyable and creative process. By understanding the basics of photo editing, choosing the right apps, and utilizing advanced editing techniques, you can transform your photos into stunning works of art. Whether you’re editing for personal enjoyment, social media, or professional purposes, Android offers a plethora of tools to help you achieve the vivid, high-definition results you desire. So grab your phone, download your favorite editing app, and start creating beautiful, eye-catching photos today!